The myriad features of GUMU™ for Sage ACT! – Sage 100 (MAS 90/200) ERP Integration makes it indispensible when it comes to integrating Sage 100(MAS 90/200) with Sage ACT!
Most of us get the Link running the very first time (generally, for Testing purpose), as GUMU™ Act link installation is a easy and straightforward wizard driven setup. However, one might face few hurdles while configuring the Link for other tasks like live deployment, deployment on another machine or reinstallation. This blog provides an insight for reconfiguring the GUMU™ ACT! Link without any Technical Support.
Below mentioned are steps to setup and configure GUMU™ ACT Link;
1) Install MAS side setup on MAS Server.(If not already done)
2) Install ACT! side setup on ACT! Server and all ACT! workstations. (if not already done.)
3) On MAS Server, Open MAS90200 Configuration screen from “Start>>All Programs>>Greytrix>> GUMU ACT! Link".
4) You can now add a Connection for a MAS Company (to be accessed in ACT!) by clicking on ‘Add New Company’
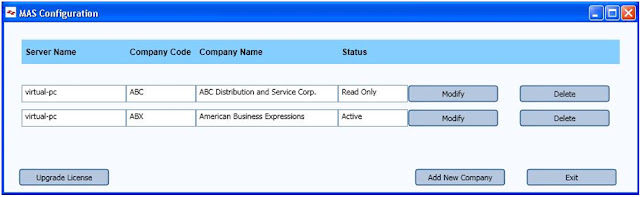
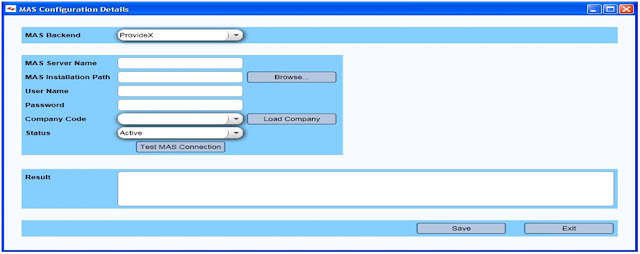
5) Fill in the required details along with the live MAS Company code in ‘Company Code’ box. After successful ‘Test Connection’ click on ‘Save’ and you have completed the MAS Side configuration for the Live MAS Company.
Note: If you want to delete the old test/dummy connection, then first unlink all the customers and vendors in ACT! which are based on the old dummy connection. Then you can delete the dummy MAS Connection on this screen.
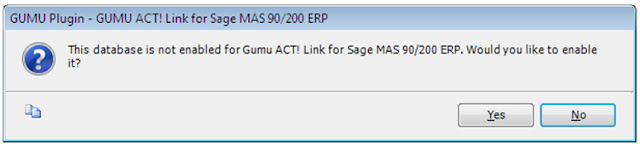
6) Now, let’s move to ACT! side configuration. Before moving forward, it is advised to take a backup of the live ACT! and MAS database. Then, Start ACT! with ‘Live’ database and you would be prompted to enable the Link. Click ‘Yes’, it will take few minutes to complete the process. [You will get this message only for the first time after your have installed the link]
7) Once you get into ACT!, go to Tools >>Manage MAS 90/200 Link >> Connections.
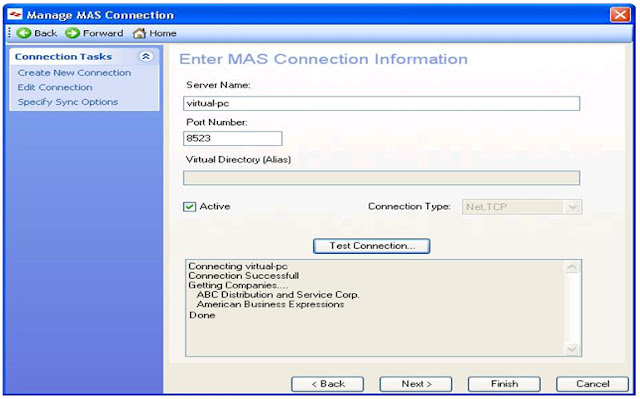
8) This would be a blank screen as you are setting up the link for the first time on this database. Click on ‘Create New Connection’ from Menus on Left hand side of the screen.
9) Here, just enter MAS Server Name or IP address. Click on ‘Test Connection’.
10) On successful ‘Test Connection’, you should see the live MAS Company Name in the result box.
11) Click on ‘Next’ and set ‘Sync Options’. Finally click on ‘Finish’
12) Restart ACT!
13) Navigate to Tools >> Manage MAS 90/200 Link >> User Permissions.
14) Assign desired permissions to users. (Especially current logged in User)
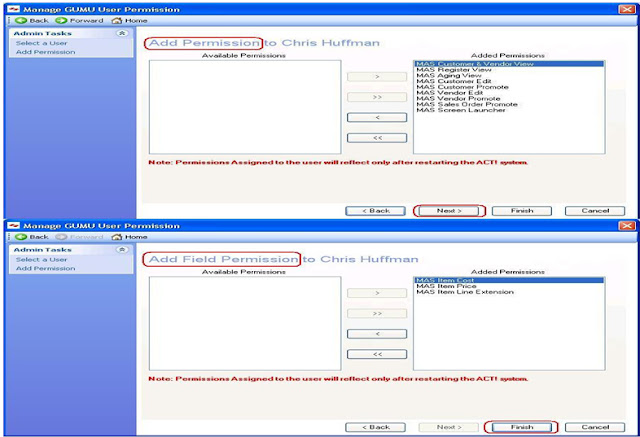
15) Click on ‘Finish’ and Restart ACT!
16) Now, you should see the MAS tabs on the ACT! Company and contact screen (if the current user has been assigned the required permissions)
That’s it! GUMU ACT! Link has been setup and configured. Now you can use any of the GUMU ACT! Link features.
Note:
These steps are to be done on the ACT! Server database. If all users are using the same database located on the Server, then there is no need of further configuration. Users just have to login and start using the Link.
For more detail related to GUMU™ ACT Link, contact us at: sage@greytrix.com